Have you ever been in that place when you have some entertaining to do and takeout seems so blah. Don't get me wrong i would love to go all Martha Stewart on you but who am i kidding ! I'd rather just order in some canapés and crepes and make life so much easier not to mention tastier, but that just doesn't scream personal. Enter semi-homemade. No, No it's notcheating i promise. It's like Cinderella!! And we all love Cinderella. I mean Cinderella was always that pretty girl, but she did need some pixie dust goodness to transform her into the girl with the glass slippers who charmed Prince Charming.
Coming back to the point, i've been spying these gorgeous rosette cakes all over the internet.
I mean, they look pretty and intricate and expensive might i add at first glance, but this is just another Cinderella story. Here's how:
Just buy a plain store bought cake. Or you can make one out of a Pilsbury box. Or you can go all Martha and bake one of these babies. Whatever route you choose, here's how you go from good to glam !
The tutorial i am choosing to show you is from iambaker.net. Enjoy !
What you need:
1. Store Bought Cake
2. Wilton 1M tip
3. Buttercream frosting
Start with your plain jane cake. Put a good crumb coat on… as in, a crumb coat that conceals the cake underneath. It can be sloppy and uneven, but you should not be able to see what color the cake is.
Put your 1M tip (or any large open star tip) into the pastry bag then fill it up with buttercream frosting.
To make your rose, start in the center, then slowly move your tip in a circle around the center point. I wanted a single rose to span the side of the cake so I looped around my center point twice.
Go all the way around the cake and complete with one last rose!
This is how it looks after completing the circumference of the cake.
Then go back and add the roses to the top using the same method.
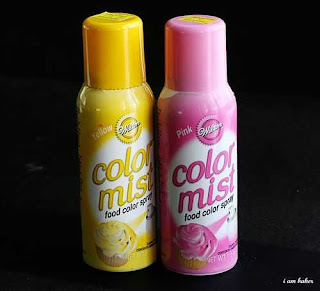
Spray & Viola !
Now, how easy was that ? Have you run out to buy your 1M tip yet :) See, it doesn't take much to add some va va voom. And the best part about this fairytale recipe is; Come midnight it's still sitting all pretty waiting to be devoured !
Until next time,
Fabulously Yours,
T


My friend!! This is great Tara! See you soon!
ReplyDelete~T
Thank you. Are you baking now ;) come soon !
DeleteThis looks great , you can even get some different tips and do a shell design.I love the shading with the food color mist, so cool!
ReplyDeleteyeah!! im tempted to try this one out the next event :)
ReplyDeleteI'm totally stoked. Gotta try it one of these days...
ReplyDeleteSyrah, you of all people should be able to do this in your sleep ! I've tasted your cakes and how delish are they :)
Delete